OpenCPI Analog Devices PlutoSDR Getting Started Guide
Document Revision History
Revision |
Description of Change |
Date |
|---|---|---|
v1.7 |
Initial release |
4/2020 |
v2.0 |
Updates made to installation process |
10/2020 |
v2.4 |
Conversion to Sphinx/RST, update to GSG template |
12/2022 |
How to Use This Document
This document provides information that is specific to setting up the OpenCPI Analog Devices ADALM-PLUTO (PlutoSDR) for use with OpenCPI. It describes system-specific details about setting up the system as a whole.
Use this document in conjunction with the OpenCPI Installation Guide. The following OpenCPI documents can also be used as references for the information in this document:
Note that the OpenCPI Glossary is also contained in both the OpenCPI Installation Guide and the OpenCPI User Guide.
This document assumes a basic understanding of the Linux command line (or “shell”) environment.
Overview
The Analog Devices ADALM-PLUTO (PlutoSDR) is a software-defined radio (SDR) Advanced Active Learning Module. See the product brief at https://www.analog.com/en/design-center/evaluation-hardware-and-software/evaluation-boards-kits/adalm-pluto.html#eb-overview for detailed information about the PlutoSDR.
The PlutoSDR is a Xilinx® Zynq-based system
that consists of an RCC/CPU (software) “PS” platform and an HDL (FPGA) “PL” platform
connected by an Advanced Extensible Interface (AXI) bus.
In OpenCPI, the PlutoSDR RCC platform is called adi_plutosdr0_38
and the PlutoSDR HDL platform is called plutosdr.
Installation Summary
To set up the PlutoSDR system for OpenCPI development, perform the following steps:
Select and configure the mode of operation for the PlutoSDR. See Enabling PlutoSDR Modes of Operation.
Update the PlutoSDR firmware. See Updating the PlutoSDR Firmware.
Perform the platform installation steps described in the section “Installation Steps for Platforms” in the OpenCPI Installation Guide to install and build the OpenCPI
adi_plutosdr0_38andplutosdrplatforms.Perform the post-platform installation steps described in the section “Installation Steps for Systems After Their Platforms Are Installed” in the OpenCPI Installation Guide, supplying the system-specific details in Setting up the PlutoSDR After its Platforms are Installed.
Enabling PlutoSDR Modes of Operation
The PlutoSDR can operate in two different modes:
PlutoSDR-as-Device - in this mode, the PlutoSDR is a USB device to a development host.
PlutoSDR-as-Host - in this mode, the PlutoSDR is the USB host. No development host is required. Supported USB devices include mass storage devices, Ethernet, and WiFi devices.
To make the PlutoSDR act the most similar to other supported devices, use the PlutoSDR-as-Host mode with a network adapter.
Enabling PlutoSDR-as-Device Mode
To enable this mode, connect a cable between the development host and the micro-USB port located at the center of the PlutoSDR and labeled with the “USB port” symbol, as shown in Figure 1:
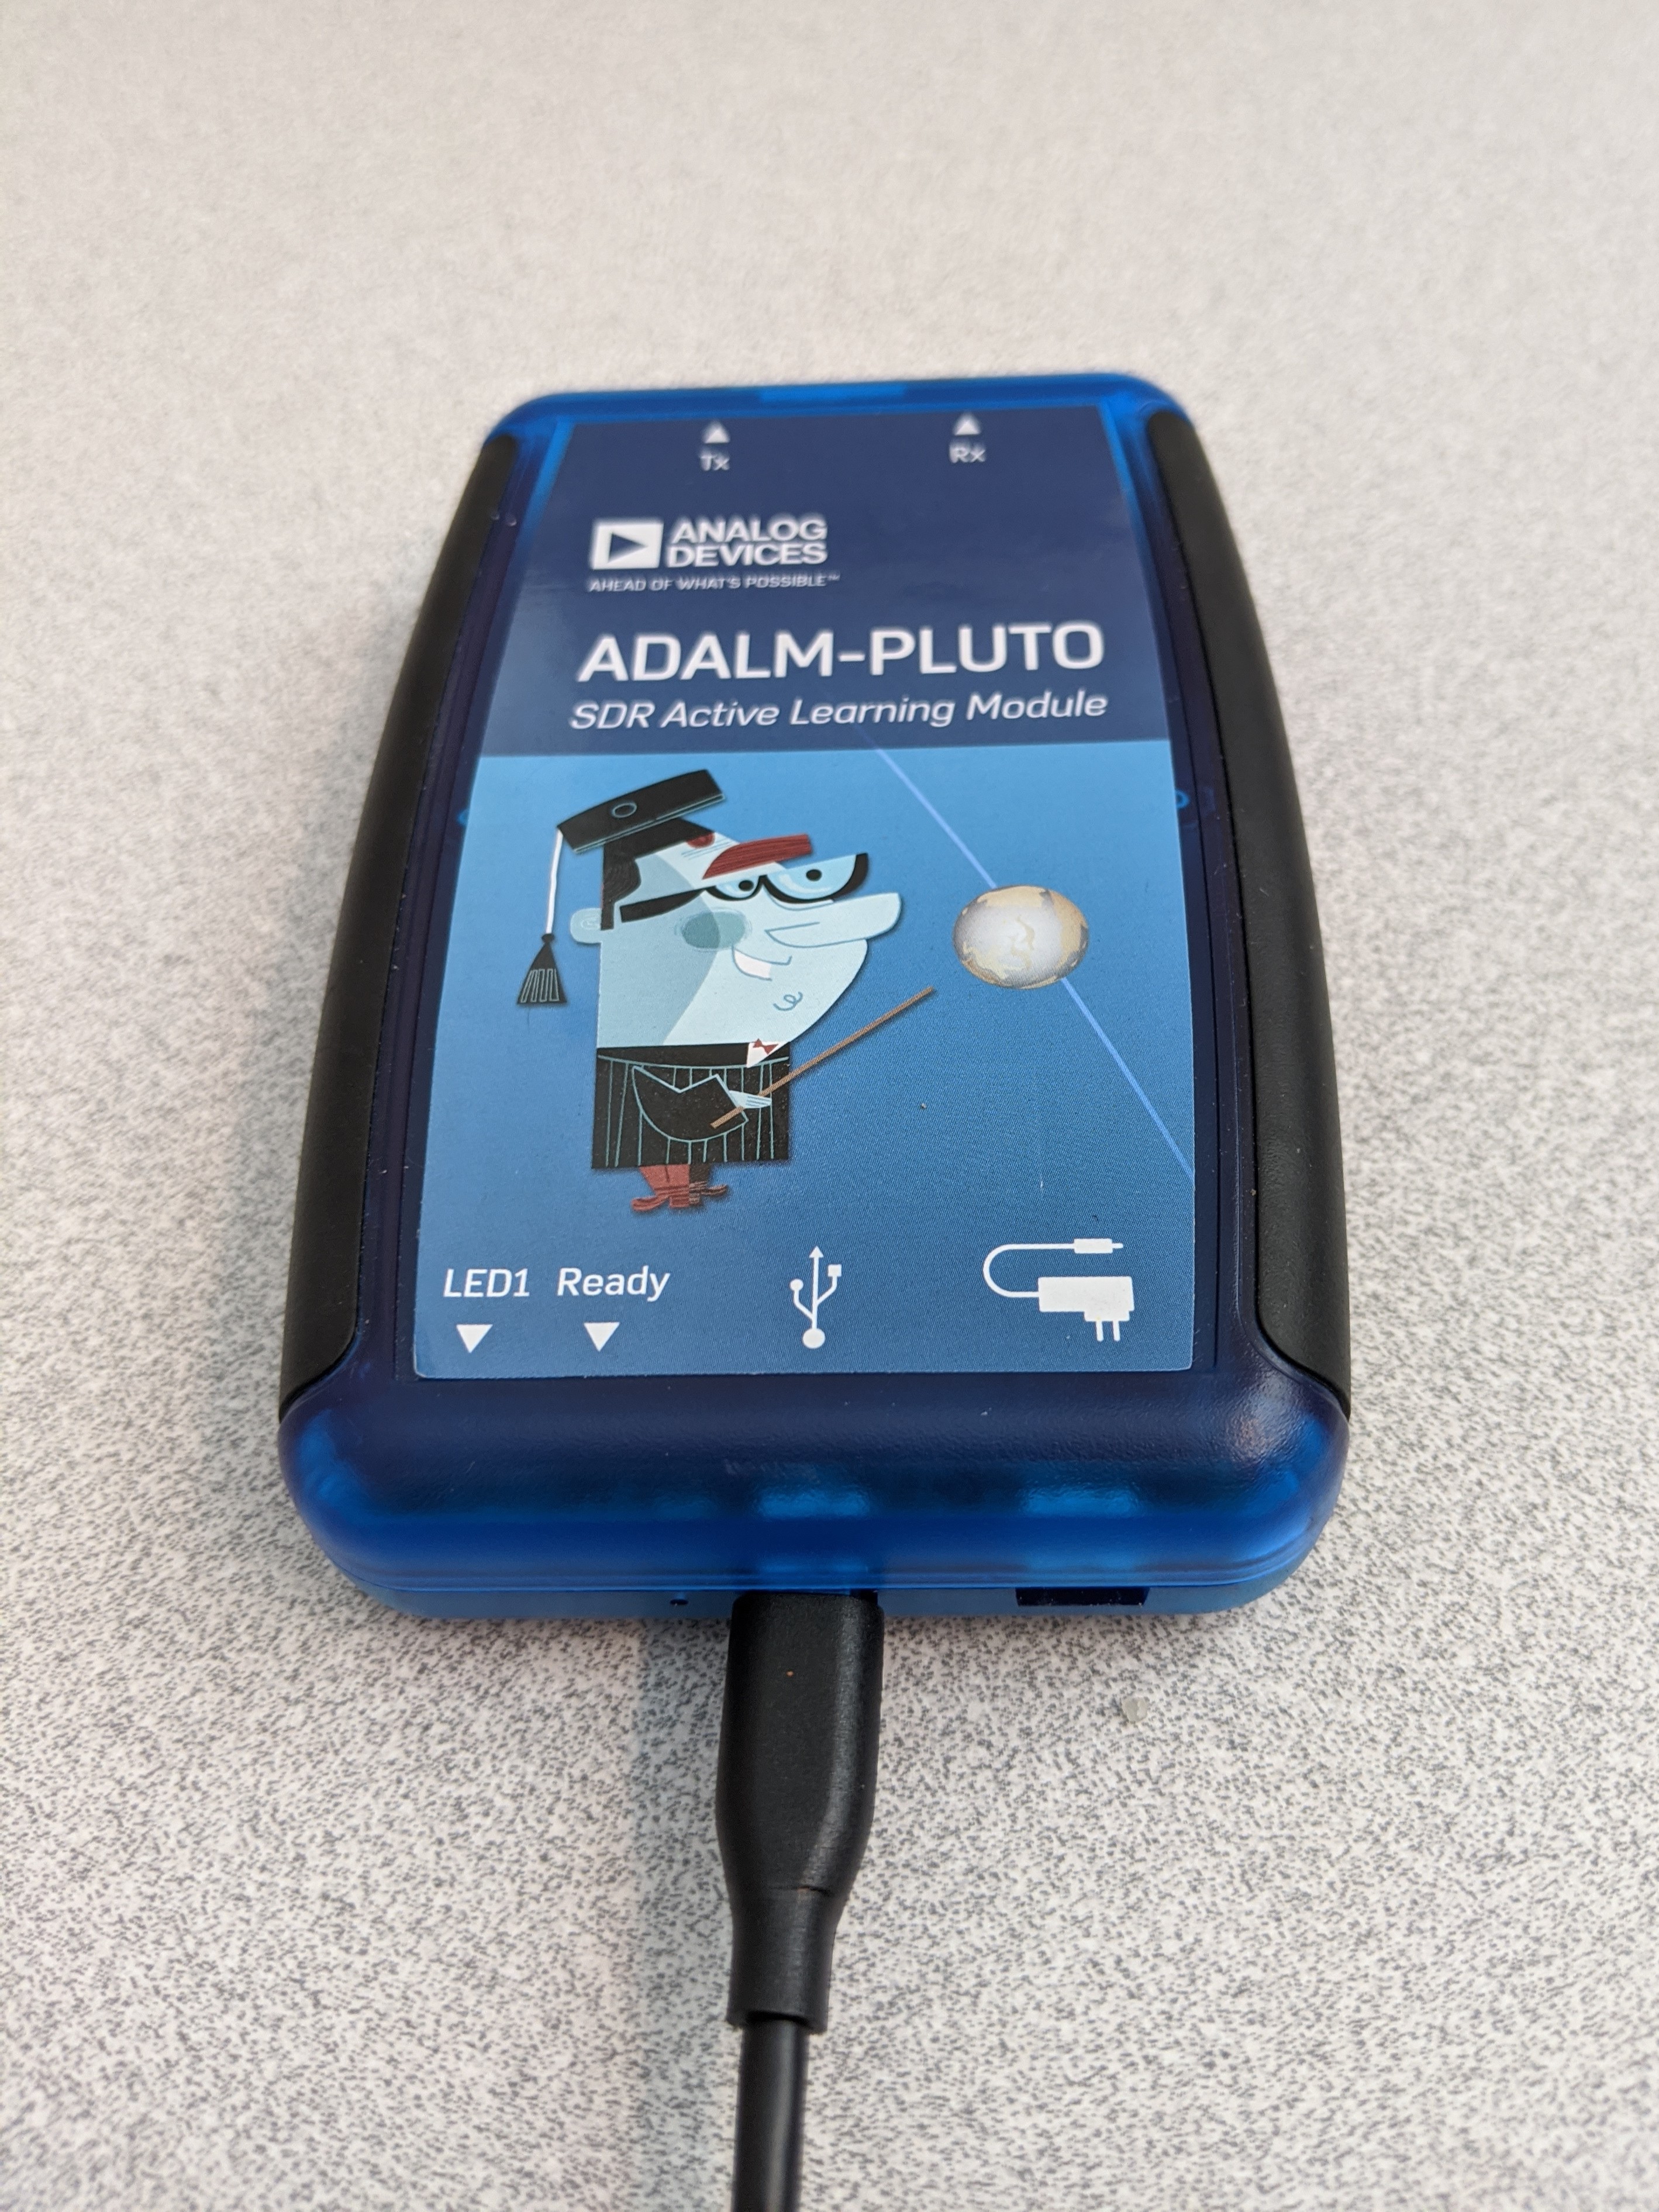
Figure 1: Connected micro-USB Cable
Both power and data are provided through this connection.
When the PlutoSDR is in this mode, it emulates several devices that appear to the development host as USB-attached devices:
USB serial, which appears as a Linux
ttydevice in/dev/ttyACMxfor use by terminal emulators likescreen.Mass storage, which appears as a writable disk that can be used to update the non-volatile boot firmware inside the PlutoSDR.
Remote Network Driver Interface Spec (RNDIS) Ethernet, which appears as an Ethernet link
ethx. The PlutoSDR IP address is set statically to192.168.2.1. The development host will need to statically set its IP address onethxto be on the same subnet as the PlutoSDR; for example,192.168.2.10. If multiple PlutoSDR systems are required to be on the same development host, the PlutoSDRconfig.txtfile must be updated to provide a unique Ethernet address for the PlutoSDR. Theconfig.txtfile is available as part of the emulated mass storage device when connected via USB on a development host. This step is necessary because by default the PlutoSDR systems have the same IP address from the factory. To resolve this problem, change the following lines in theconfig.txtfile and modify the Ethernet address to be unique:# [NETWORK] # hostname = plutosdr # ipaddr = <unique IP address> # ipaddr_host = 192.168.2.10 # netmask = 255.255.255.0
Enabling PlutoSDR-as-Host Mode
To enable this mode, you need the following items:
USB On-the-Go (OTG) cable
Compatible USB dongle
USB power supply
When an Ethernet dongle is attached, the system’s IP address is issued by a DHCP server.
Alternatively, the system’s IP address can be statically set using the config.txt file
provided on the PlutoSDR emulated mass storage device.
Figure 2: shows the PlutoSDR-as-Host mode hardware configuration.
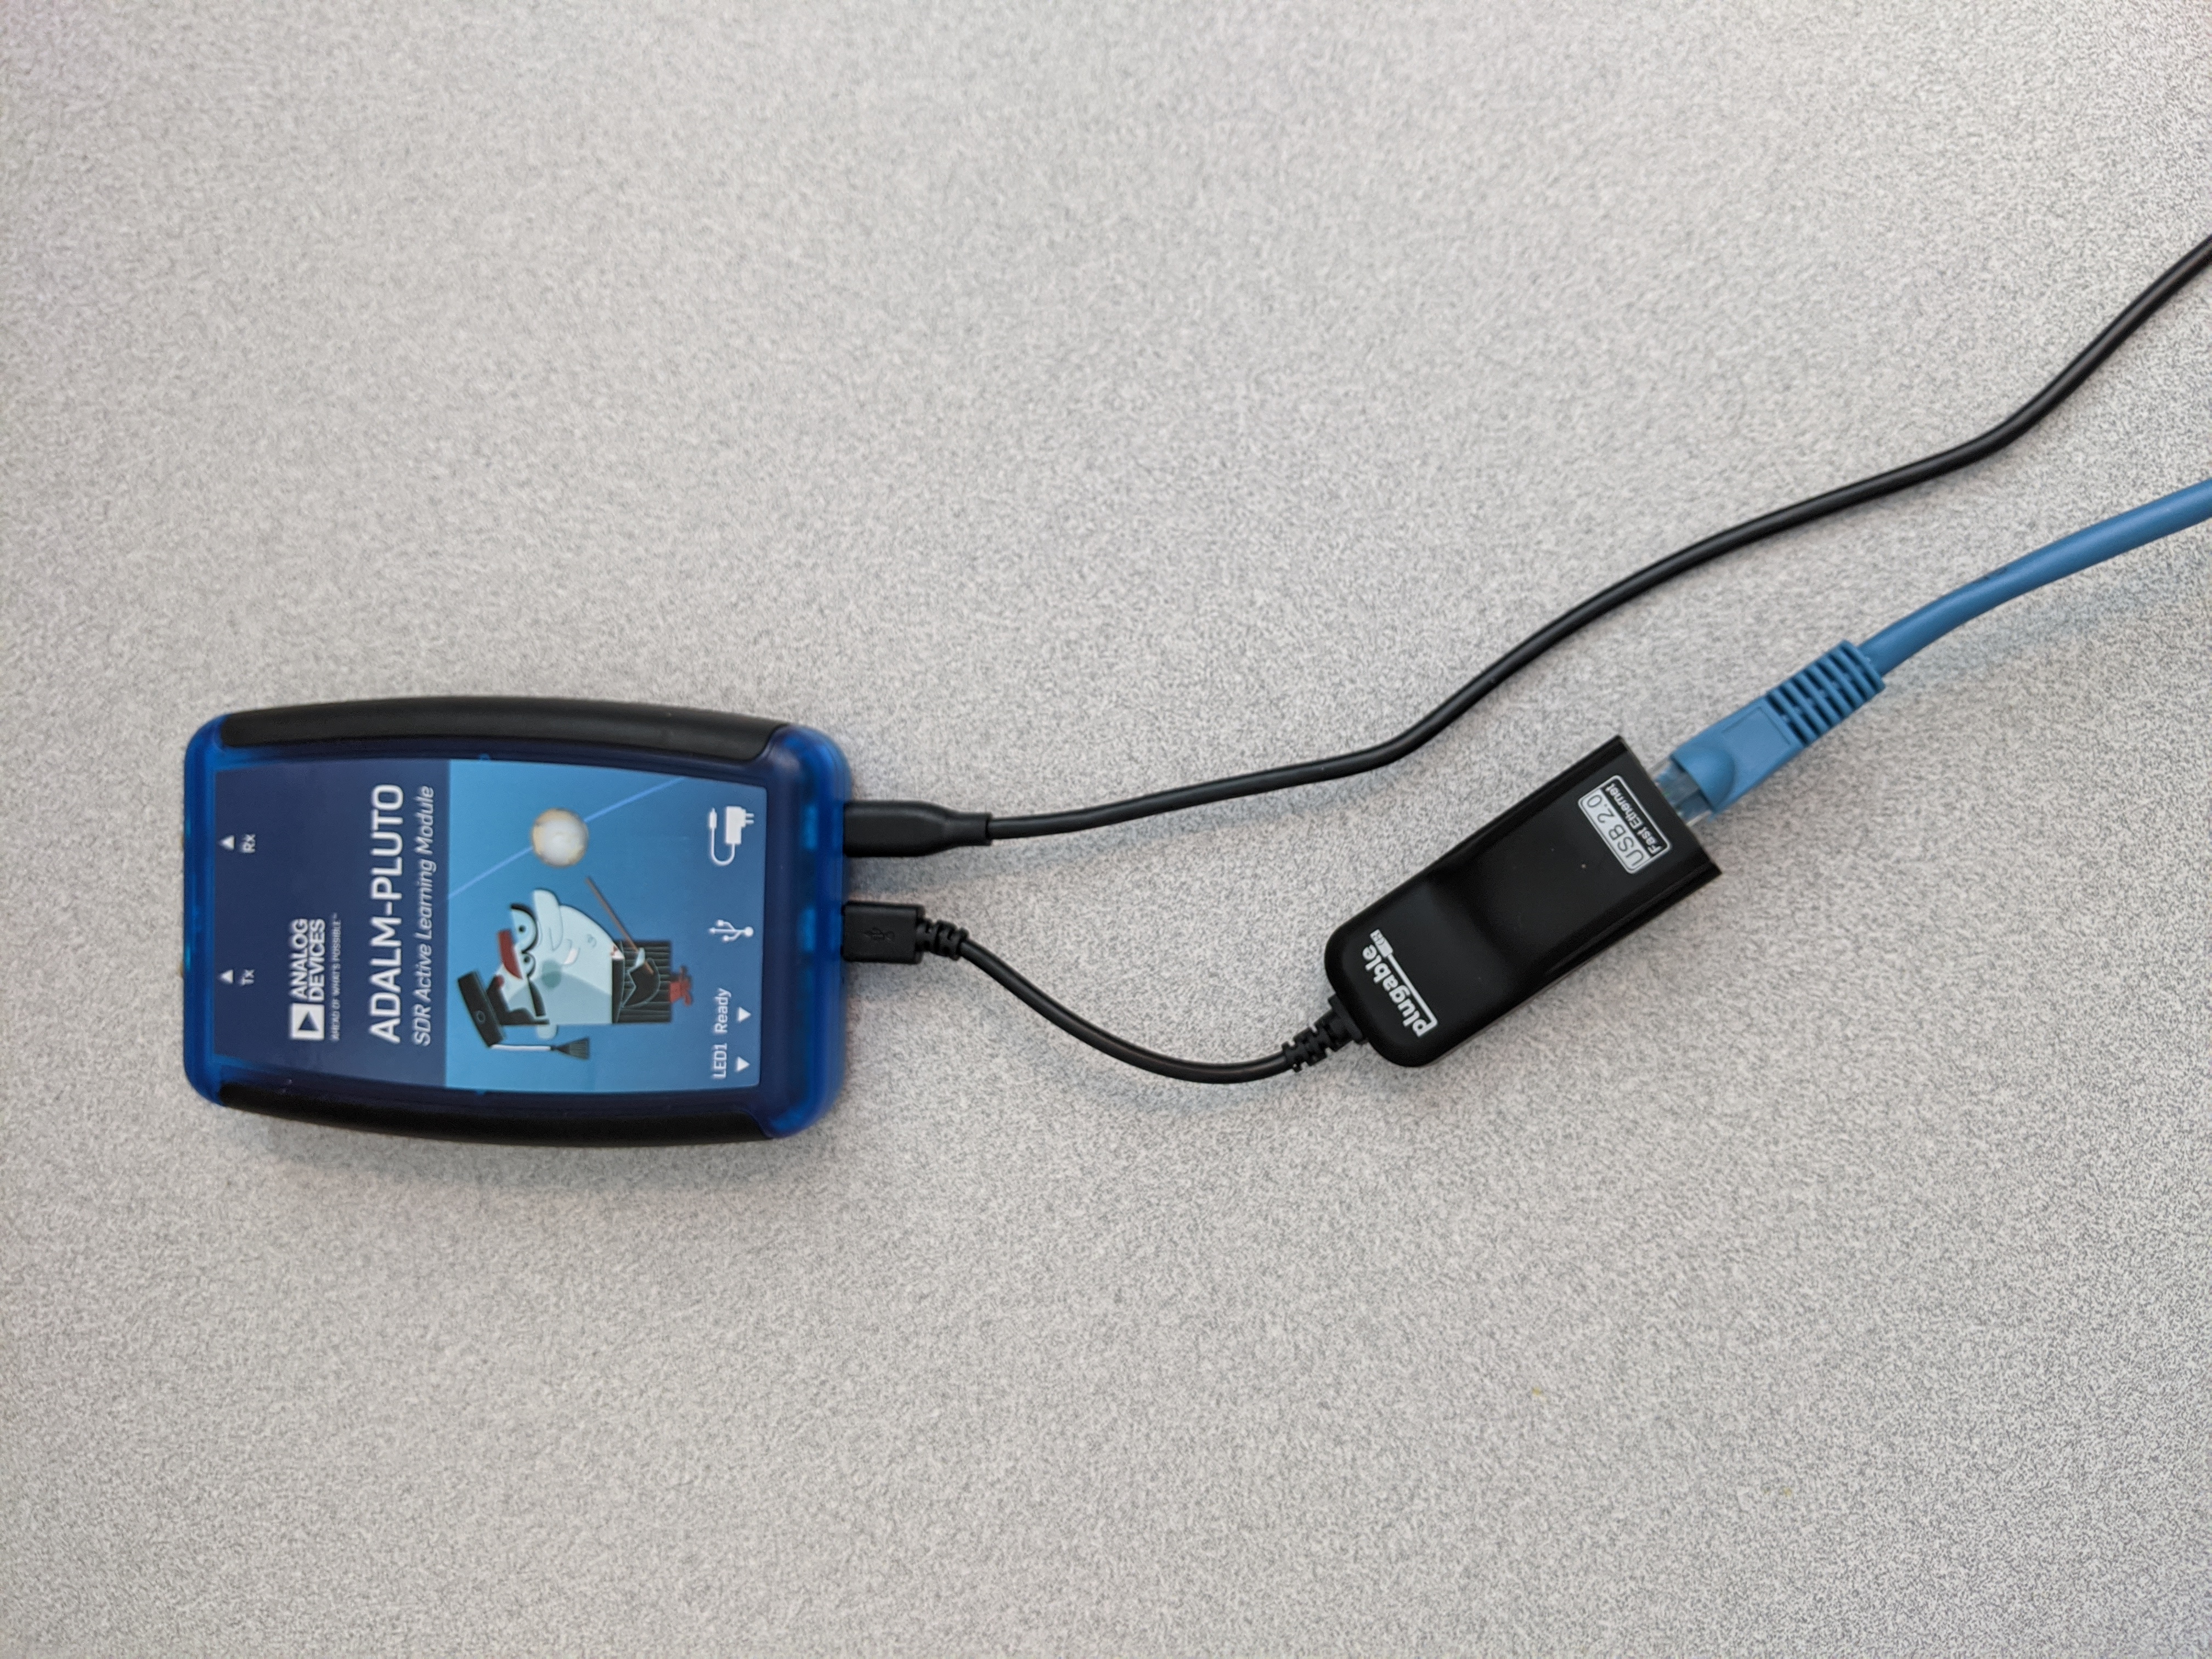
Figure 2: Connected OTG Ethernet Device
In this configuration, use SSH to access the PlutoSDR’s command prompt. Power must be applied to the micro-USB port labeled with the power supply symbol.
For more information about this mode, see https://wiki.analog.com/university/tools/pluto/usb_otg_host_function_support.
Updating the PlutoSDR Firmware
Note
The PlutoSDR must be in PlutoSDR-as-Device mode to perform a firmware update.
The PlutoSDR firmware must be updated in order to use the OpenCPI runtime environment.
The PlutoSDR uses an emulated mass storage device instead of an SD card as a method to update its firmware. Use the steps below to update the device’s firmware. Additional information can be found at https://wiki.analog.com/university/tools/pluto/users/firmware.
Connect the PlutoSDR to the development host as described in Enabling PlutoSDR-as-Device Mode.
Download the prebuilt artifacts provided by Analog Devices at https://github.com/analogdevicesinc/plutosdr-fw/releases/download/v0.38/plutosdr-fw-v0.38.zip.
Move the file
pluto.frmfrom the unzipped file downloaded in the previous step onto the device to update its firmware.Unmount the mass storage device. If on a virtual machine, eject the USB device from the host as well.
The LEDs on the PlutoSDR should start to blink and continue blinking for about a minute.
When the firmware update is complete, the PlutoSDR reboots itself and the emulated devices reappear on the development host.
Issues Regarding Storage
The adi_plutosdr0_38 does not support NFS mounts. Also, the PlutoSDR only
has about 30 of volatile storage. To use a larger storage volume,
use a USB hub to connect a flash drive to the PlutoSDR.
Setting up the PlutoSDR After its Platforms are Installed
This section describes steps to enable the OpenCPI development and execution environment that must be performed on the PlutoSDR after its platforms have been installed. It also contains setup information specific to the PlutoSDR system that is needed when performing the tasks described in the section “Installation Steps for Systems After their Platforms are Installed” in the OpenCPI Installation Guide.
Details for Establishing a Serial Console Connection for the PlutoSDR
This section contains details about the PlutoSDR that pertain to the instructions for setting up a serial I/O console described in the section “Establishing a Serial Console Connection” in the OpenCPI Installation Guide:
On PlutoSDR, the serial console port operates at 115200 baud.
The PlutoSDR must be in PlutoSDR-as-Device mode (see Enabling PlutoSDR-as-Device Mode) to access the Linux console.
Details for Configuring the Runtime Environment for the PlutoSDR
This section contains details about the PlutoSDR that pertain to the instructions for setting up a serial I/O console described in the section “Configuring the Runtime Environment” in the OpenCPI Installation Guide:
The primary mode of operation for the PlutoSDR is server mode.
The PlutoSDR username and password is initially set to
root:analog.