OpenCPI ZedBoard Getting Started Guide
This document provides installation information that is specific to the Avnet (Digilent) ZedBoard. It is intended to be used in tandem with the OpenCPI Installation Guide, which describes the general steps to enable OpenCPI for use on an embedded system. Use this guide as a companion to the OpenCPI Installation Guide, especially when performing the steps described in the chapter “Enabling OpenCPI Development for Embedded Systems”. It provides details about the ZedBoard system that can be applied to the procedures described in that section.
The following documents can also be used as reference to the tasks described in this document:
Note that the OpenCPI Glossary is also contained in both the OpenCPI Installation Guide and the OpenCPI User Guide.
This document assumes a basic understanding of the Linux command line (or “shell”) environment.
Revision History
Revision |
Description of Change |
Date |
|---|---|---|
v1.1 |
Initial Release |
3/2017 |
v1.2 |
Updated for OpenCPI Release 1.2 |
8/2017 |
v1.3 |
Updated for OpenCPI Release 1.3 |
2/2018 |
pre-v1.4 |
Fixed inaccurate description for hardware jumper configuration, OpenCPI-SD-zed directory path, and MAC address modification instructions for multiple Zedboards on the same network |
4/2018 |
v1.4 |
Update descriptions and paths |
9/2018 |
v1.5 |
Deprecate Zipper |
4/2018 |
v1.6 |
Refer to Installation Guide where possible |
1/2020 |
v2.2 |
Convert to RST, update to xilinx19_2_aarch32 |
4/2021 |
Software Prerequisites
As shown in the Table of Supported Platforms in the OpenCPI Installation Guide,
support for the ZedBoard system is based on the zed or zed_ise OpenCPI
HDL (FPGA) platform and the xilinx19_2_aarch32 OpenCPI RCC (software) platform.
The zed is the default HDL platform for the ZedBoard system and
is defined to support the Xilinx Vivado tools, while the zed_ise platform
is defined to support the older Xilinx ISE tools in cases where use of these
older tools is required. The HDL platforms are supported by
the ocpi.platform built-in project, while
the RCC platforms are supported by the ocpi.core built-in project.
RCC Platforms
The ZedBoard system supports the RCC platform xilinx19_2_aarch32, which
is also used by other systems such as the Ettus E310 (e31x).
If this platform has already been installed and built for another system,
it can apply to the ZedBoard and does not need to be installed and built.
Third-party/Vendor Tools
As shown in the OpenCPI Installation Guide Table of Supported Platforms,
the tools used for cross compilation are from Xilinx Vitis 2019.2
and the tools used for the FPGA are any recent version
of the Xilinx Vivado WebPACK tools (zed) or Xilinx ISE 14.7 WebPACK (zed_ise).
The Xilinx Linux kernel for the xilinx19_2_aarch32 RCC platform is based
on the Xilinx Linux kernel tagged xilinx-v2019.2.
The chapter “Installing Third-party/Vendor Tools” in the OpenCPI Installation Guide
describes how to install these tools.
Build the Required OpenCPI Projects
The OpenCPI Installation Guide describes how to build the standard built-in OpenCPI projects.
This step results in a single executable FPGA test application named bias that is
ready to run. The bias test application is based on the testbias HDL assembly.
Both bias and testbias reside in the ocpi.assets built-in project.
Hardware Prerequisites
The ZedBoard system requires the following hardware setup.
Zedboard Product Package
The ZedBoard product package should include the following items:
Power supply
micro-USB to USB cable
Micro-USB to female-USB adapter
Standard SD card (4GB)
OpenCPI has been tested on Zedboard revisions C and D.
The micro-USB serial port, labeled UART and located on the top side of the ZedBoard, can be used to access the serial connection with the processor.
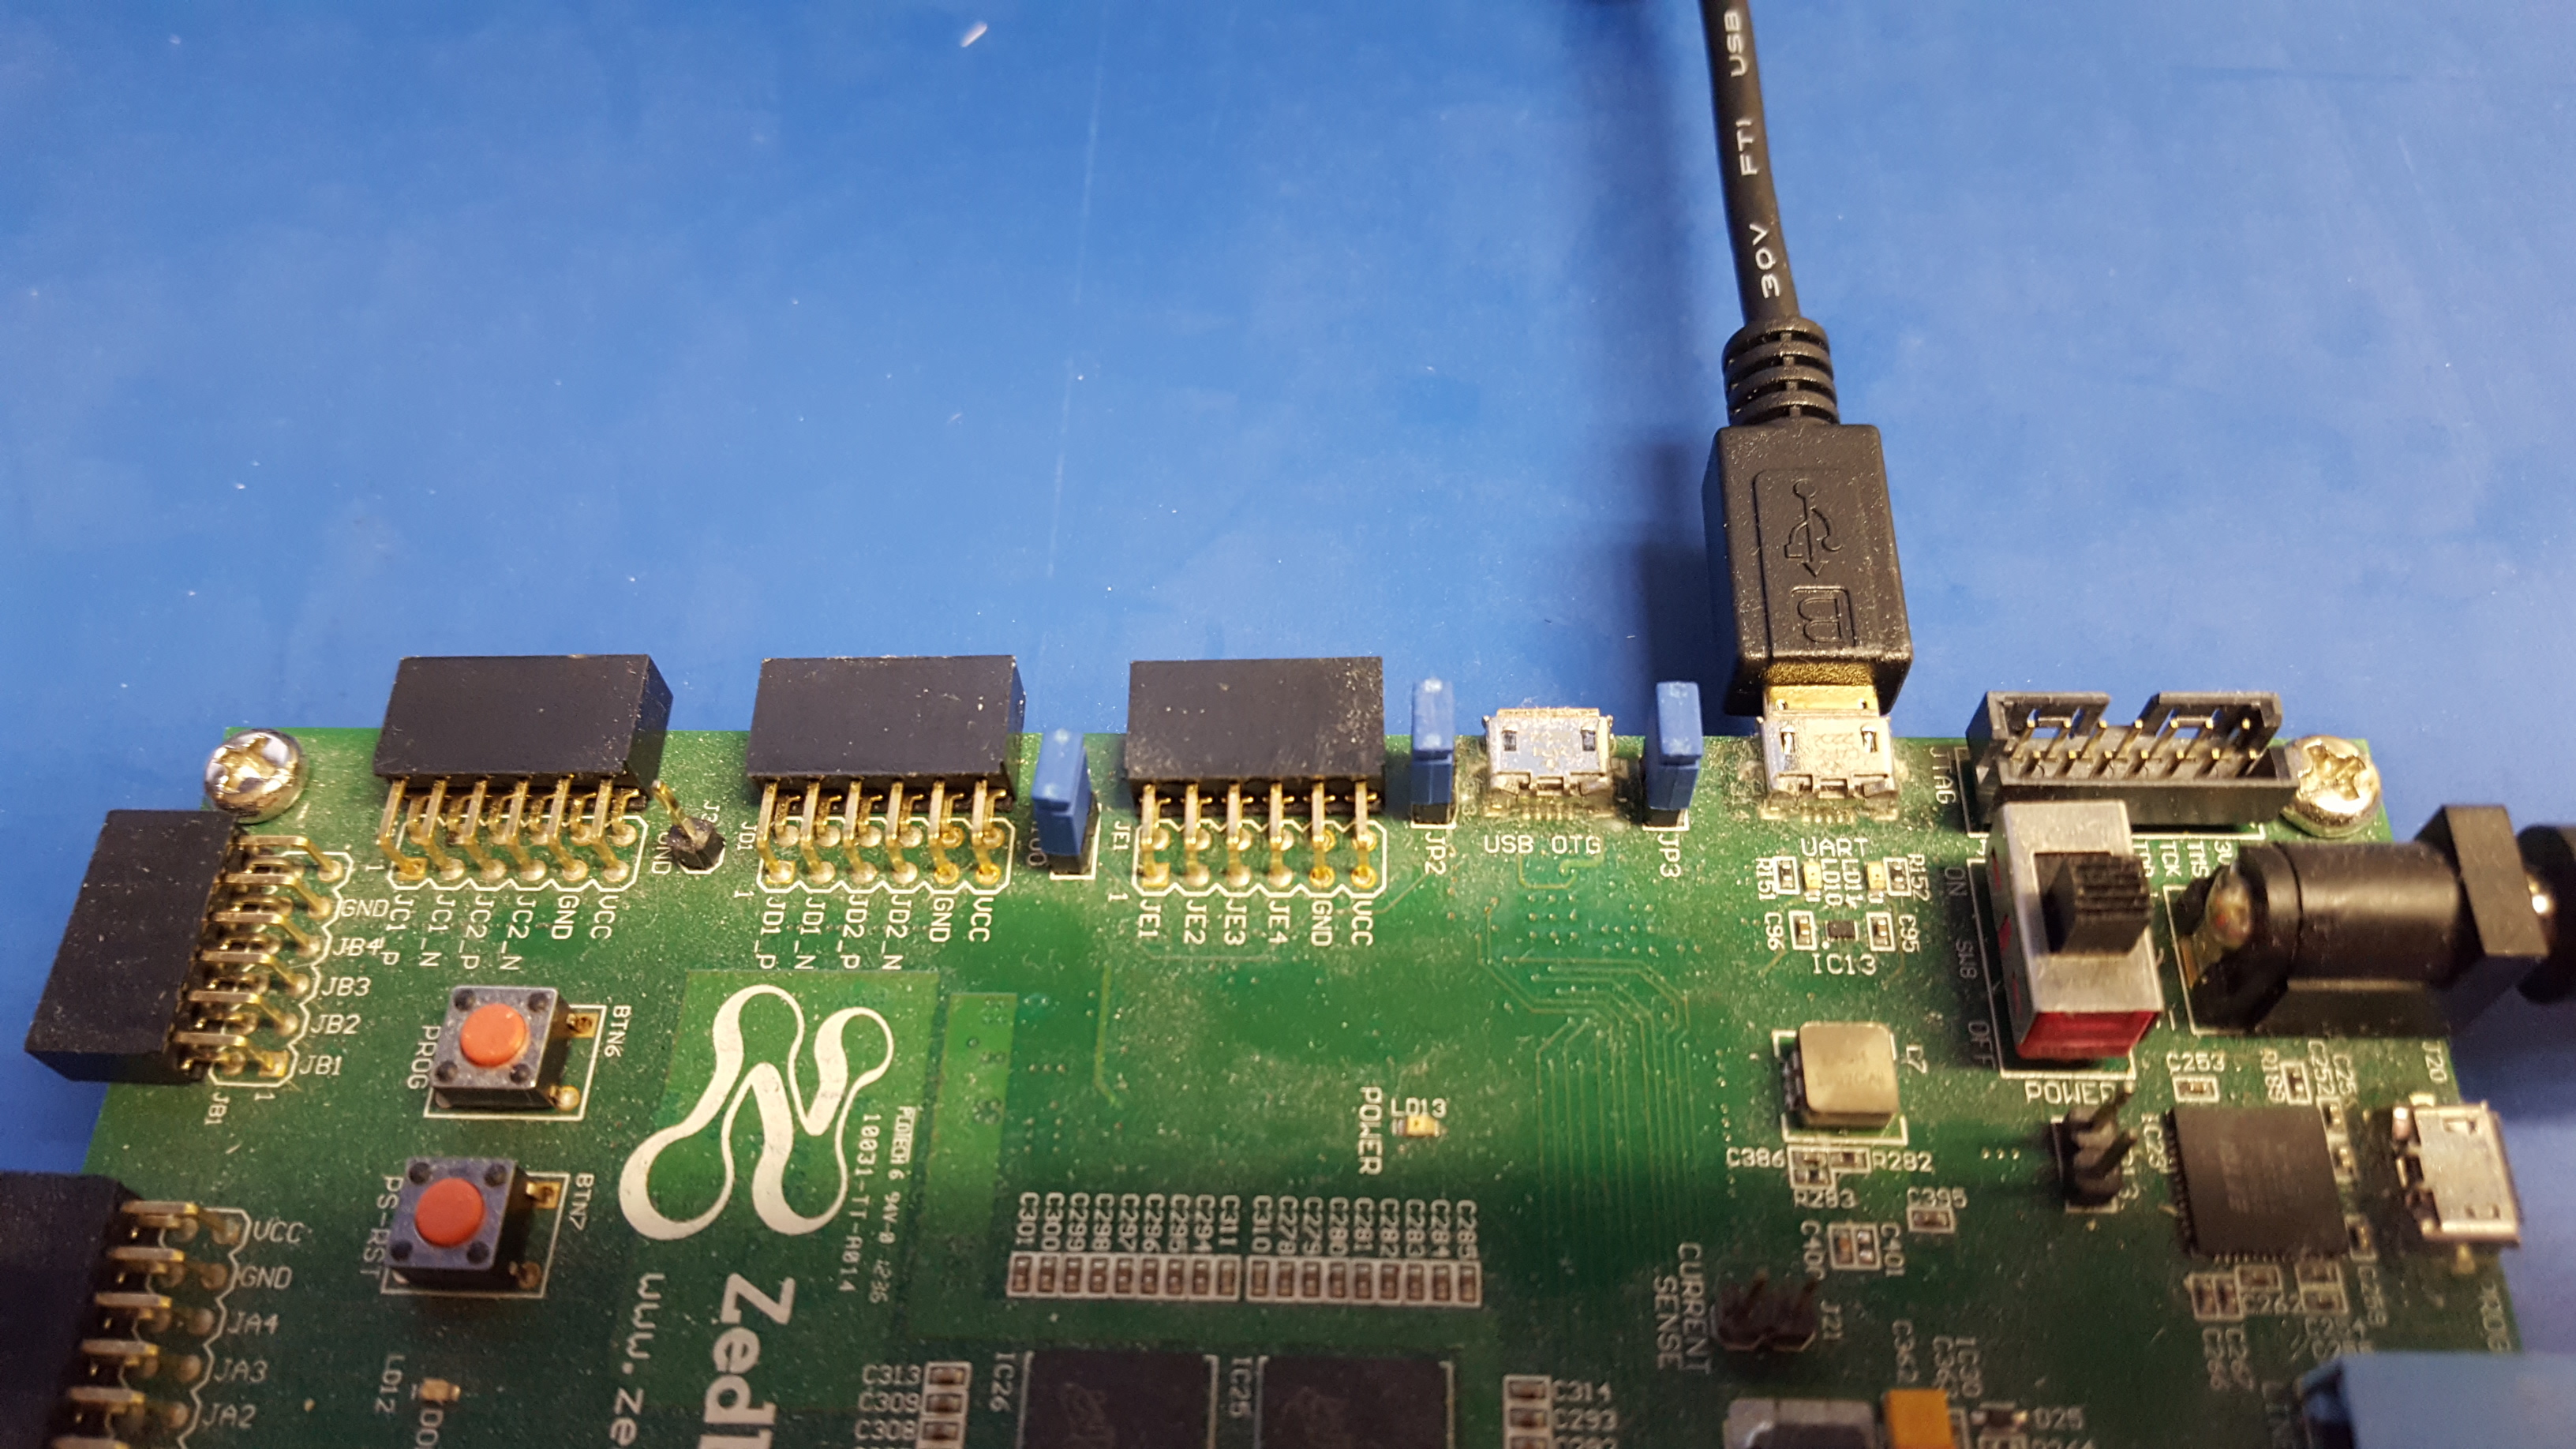
Figure 15: Connected Serial USB
The SD card slot is located below the FMC LPC slot on the bottom side of the ZedBoard.
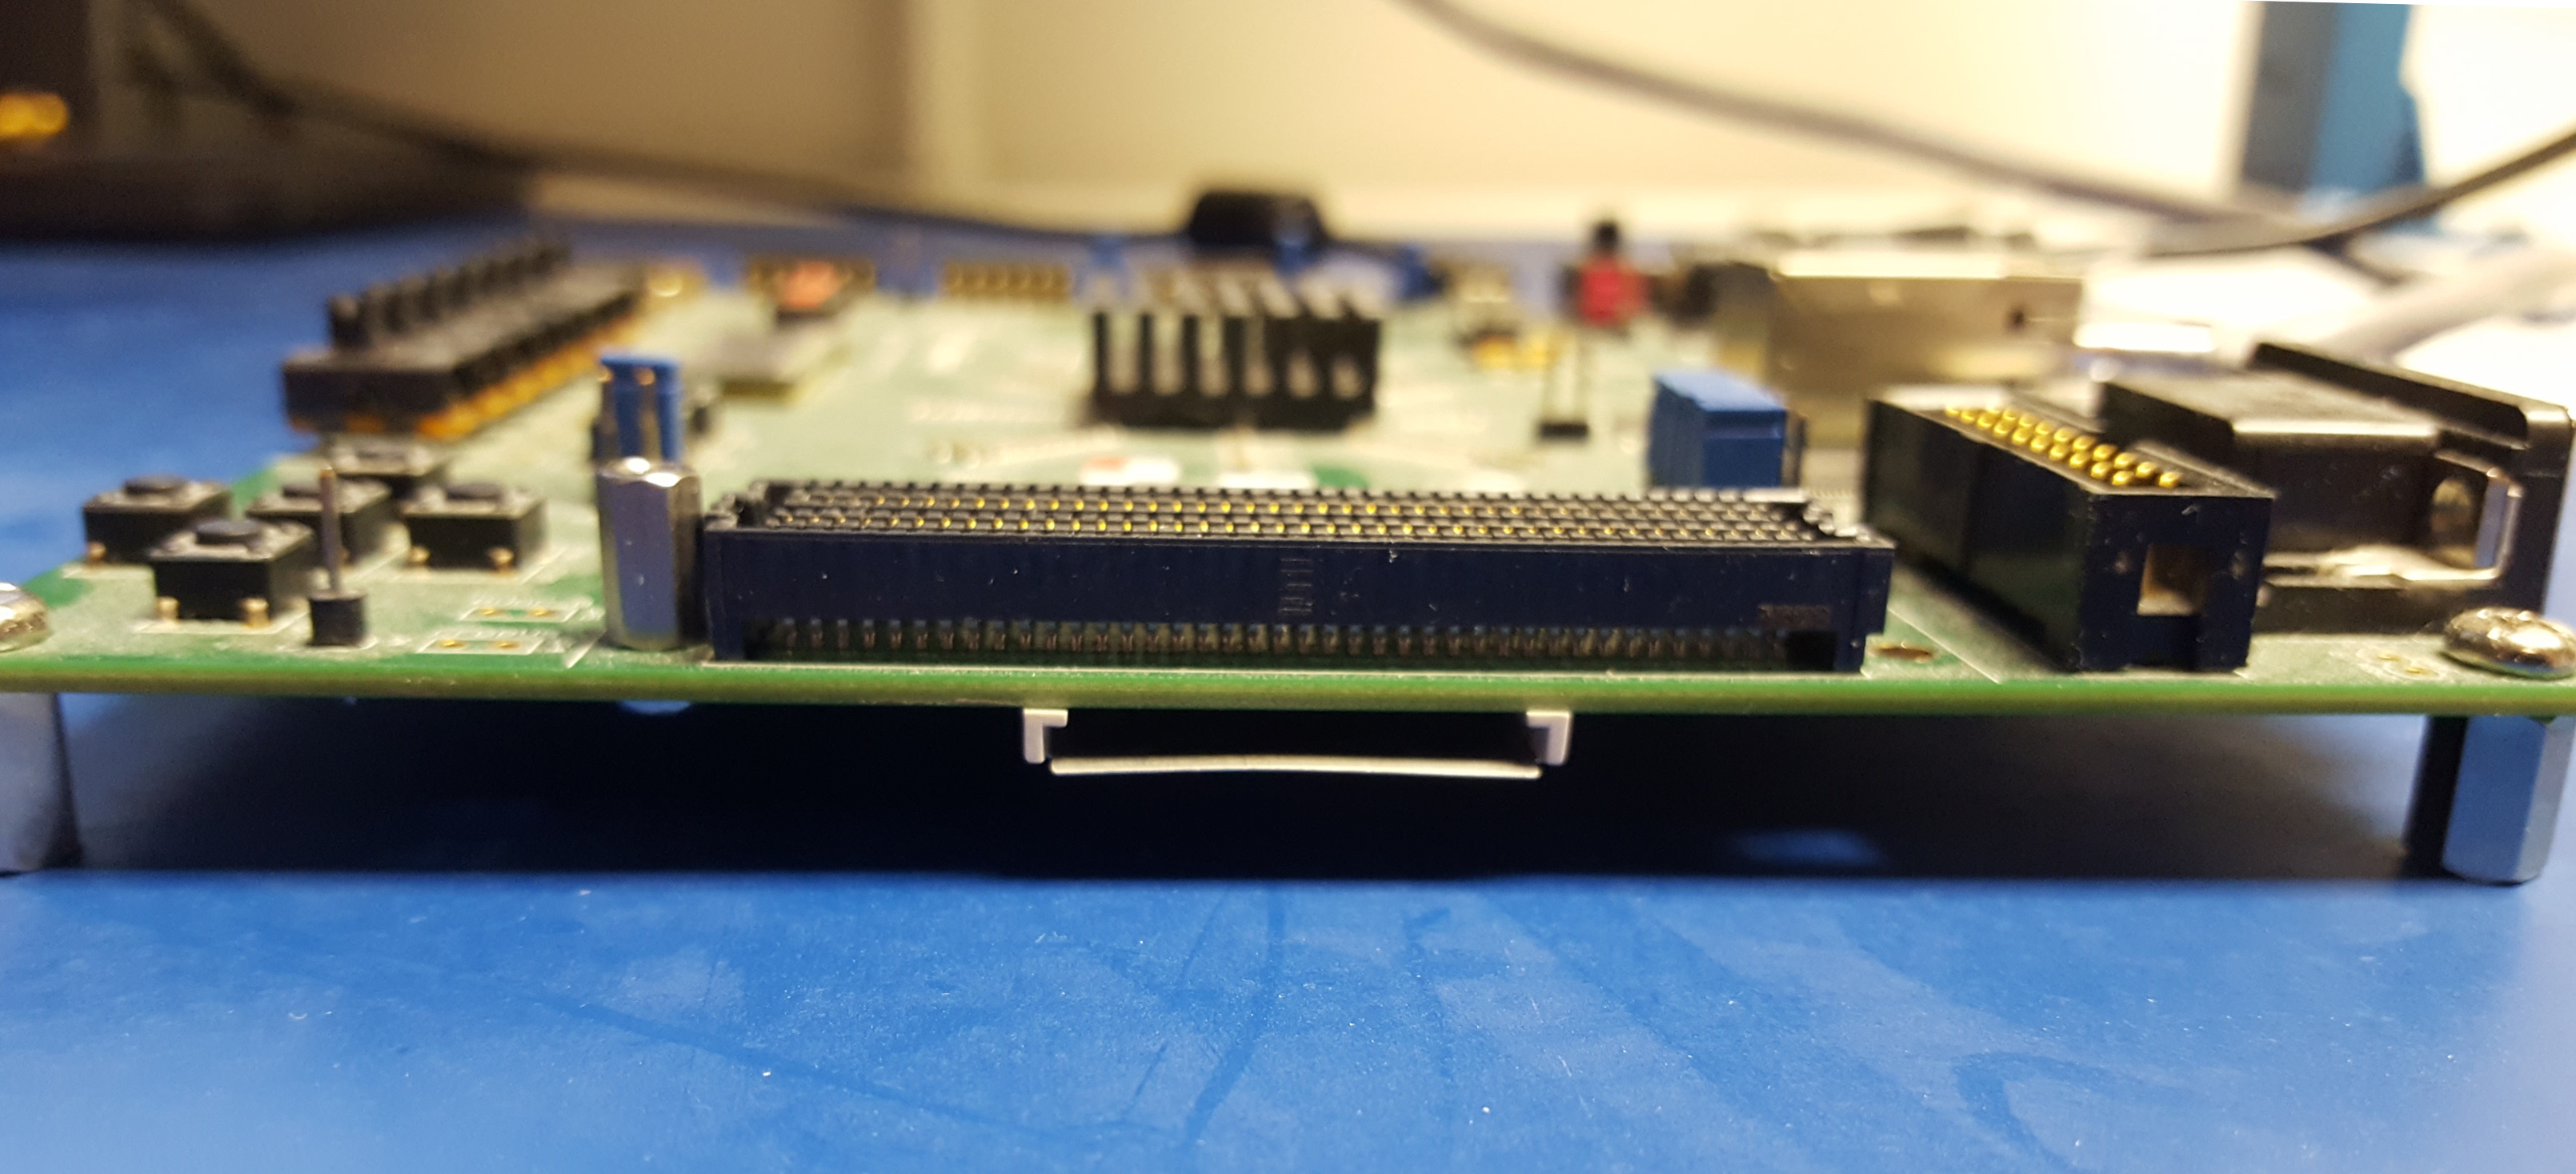
Figure 16: ZedBoard FMC Slot and SD Card Slot
Ethernet Cable
An Ethernet port is available on the ZedBoard and is required when the network mode environment is used. The OpenCPI BSP for the ZedBoard is configured for DHCP.
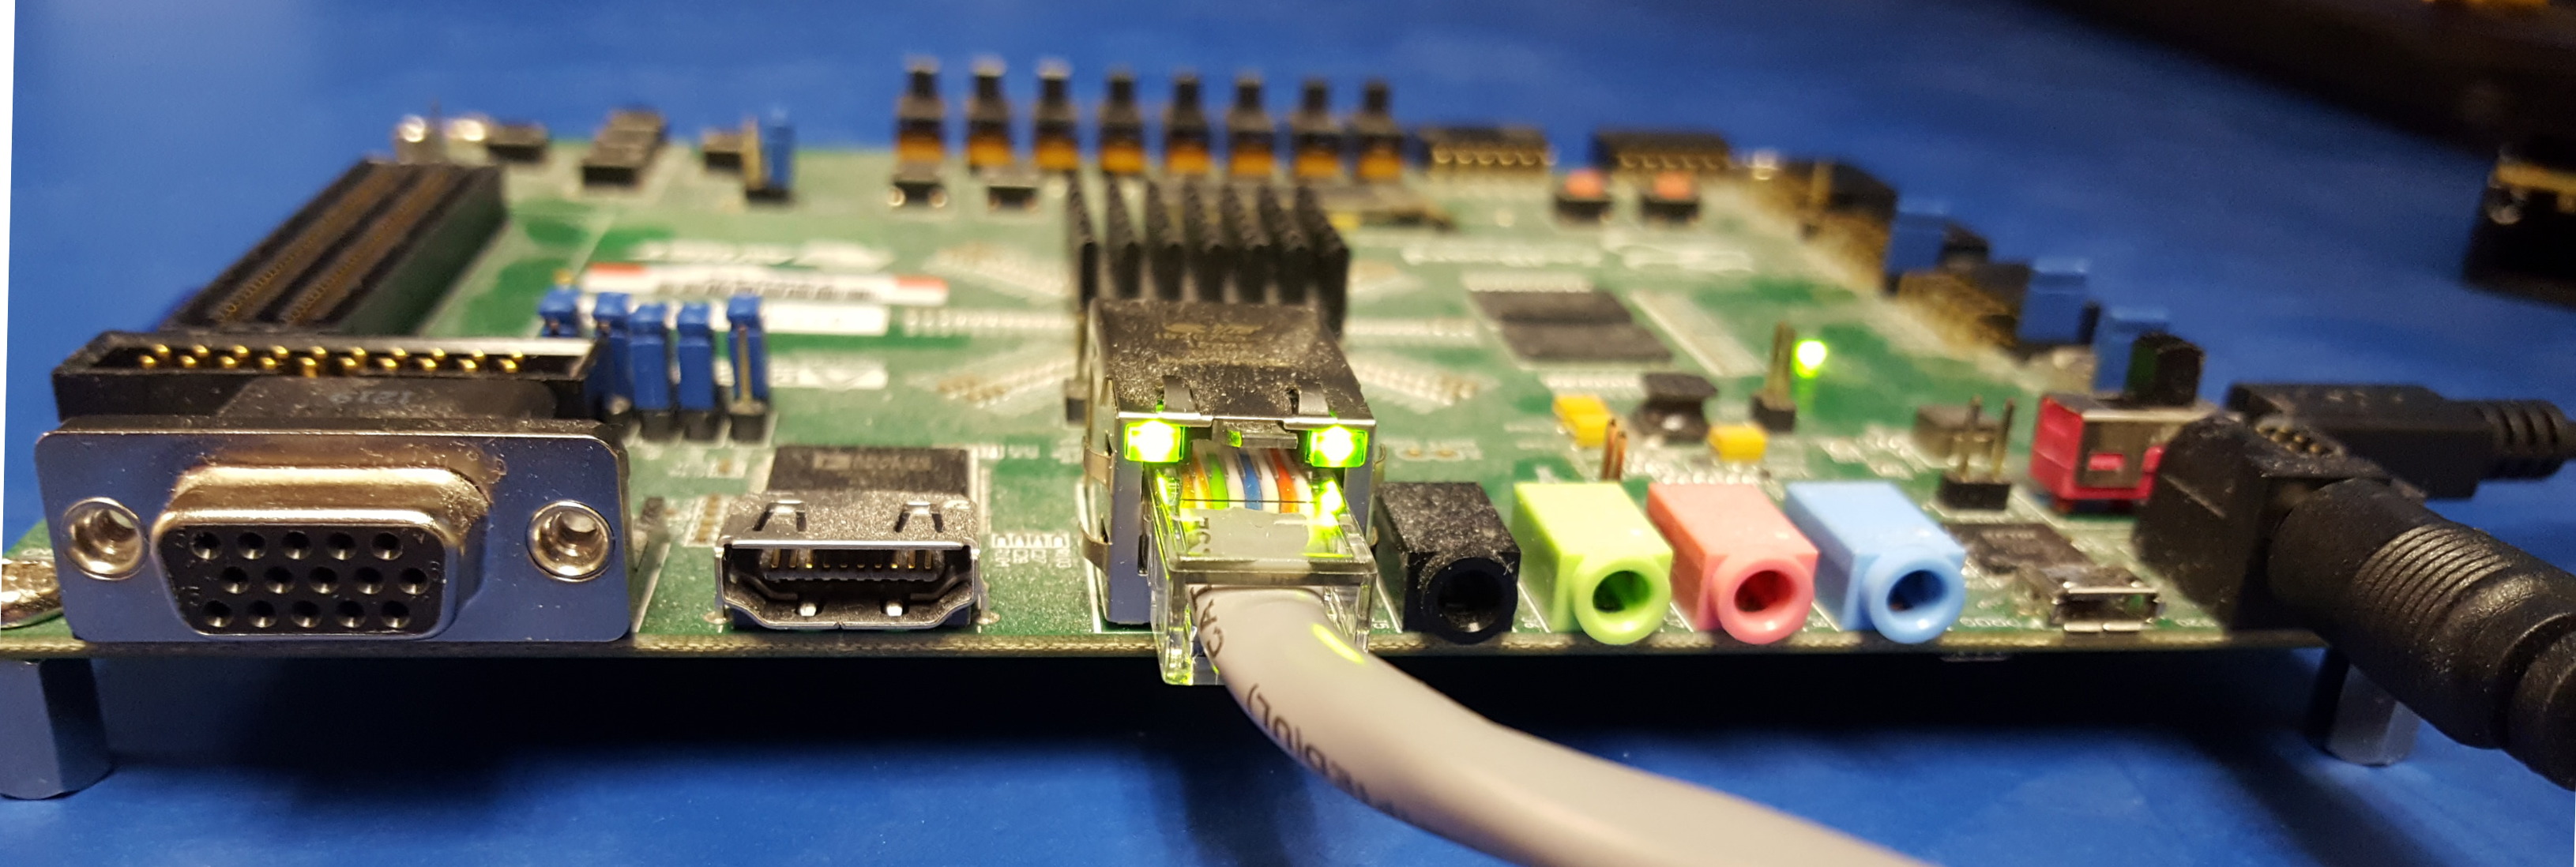
Figure 17: Connected Ethernet
OpenCPI ZedBoard Supported Daughtercards (Optional)
The ZedBoard has an FMC LPC slot that is used to connect plug-in modules or daughtercards. Currently, OpenCPI supports two daughtercards that can be installed on the ZedBoard:
Analog Devices FMCOMMS2
Analog Devices FMCOMMS3
DHCP Support
Using the ZedBoard system in network mode requires access to a network that supports DHCP.
SD Card Reader
The ZedBoard hardware setup requires an SD card reader.
Setting up the SD Card
The chapter “Enabling OpenCPI Development for Embedded Systems” in the OpenCPI Installation Guide provides a section “Installation Steps for Systems after its Platforms are Installed” that describes how to create a new SD card for OpenCPI and how to customize some of the OpenCPI SD card files for your particular configuration. The recommended method is to make a raw copy of the manufacturer-supplied card to a new card, preserving formatting and content, and then remove most of the original files and copy files from OpenCPI. If you need to format the SD card for the ZedBoard system, it should be a single FAT32 partition.
Setting up Multiple ZedBoards on the Same Network
By default, each ZedBoard released by the factory has
the same MAC address. If you require multiple ZedBoards
to be on the same network, you must edit the SD card OpenCPI
startup scripts mynetsetup.sh or mysetup.sh to provide
a unique MAC address for each ZedBoard. These scripts are created
for the ZedBoard (zynq) when you perform the step described
in the section “Preparing the SD Card Contents” in the
OpenCPI Installation Guide.
To update the SD card startup scripts, uncomment the following
lines in the mynetsetup.sh and/or mysetup.sh scripts
and then change the Ethernet address to be unique. For example:
# ifconfig eth0 down
# ifconfig eth0 hw ether 00:0a:35:00:01:24
# ifconfig eth0 up
# udhcpc
where 00:0a:35:00:01:24 is the unique MAC address for the ZedBoard.
Setting up the Hardware
The OpenCPI Installation Guide describes the procedure to establish a serial console and boot the system. This section provides Zedboard-specific information that applies to these tasks.
Establishing a Serial Console Connection
The OpenCPI Installation Guide has a section “Establishing a Serial Console Connection” that describes the procedure to establish a serial console. On Zedboard systems, the console serial port operates at 115200 baud. The cable used is a micro-USB to USB-A cable to connect its console micro-USB port to the development host.
Booting the Zedboard from the SD Card
The Zedboard unit needs to be configured to boot from the SD card. To configure the unit and then boot from the SD card:
Remove power from the Zedboard unit.
On the top of the Zedboard unit, set the following jumpers to boot from the SD card:
Set JP10 to 3.3V.
Set JP9 to 3.3V.
Set JP8 to GND.
Set VADJ SELECT (J18) to 2V5 to ensure proper FMC configuration. The only supported FMC voltage for OpenCPI bitstreams is 2.5V.
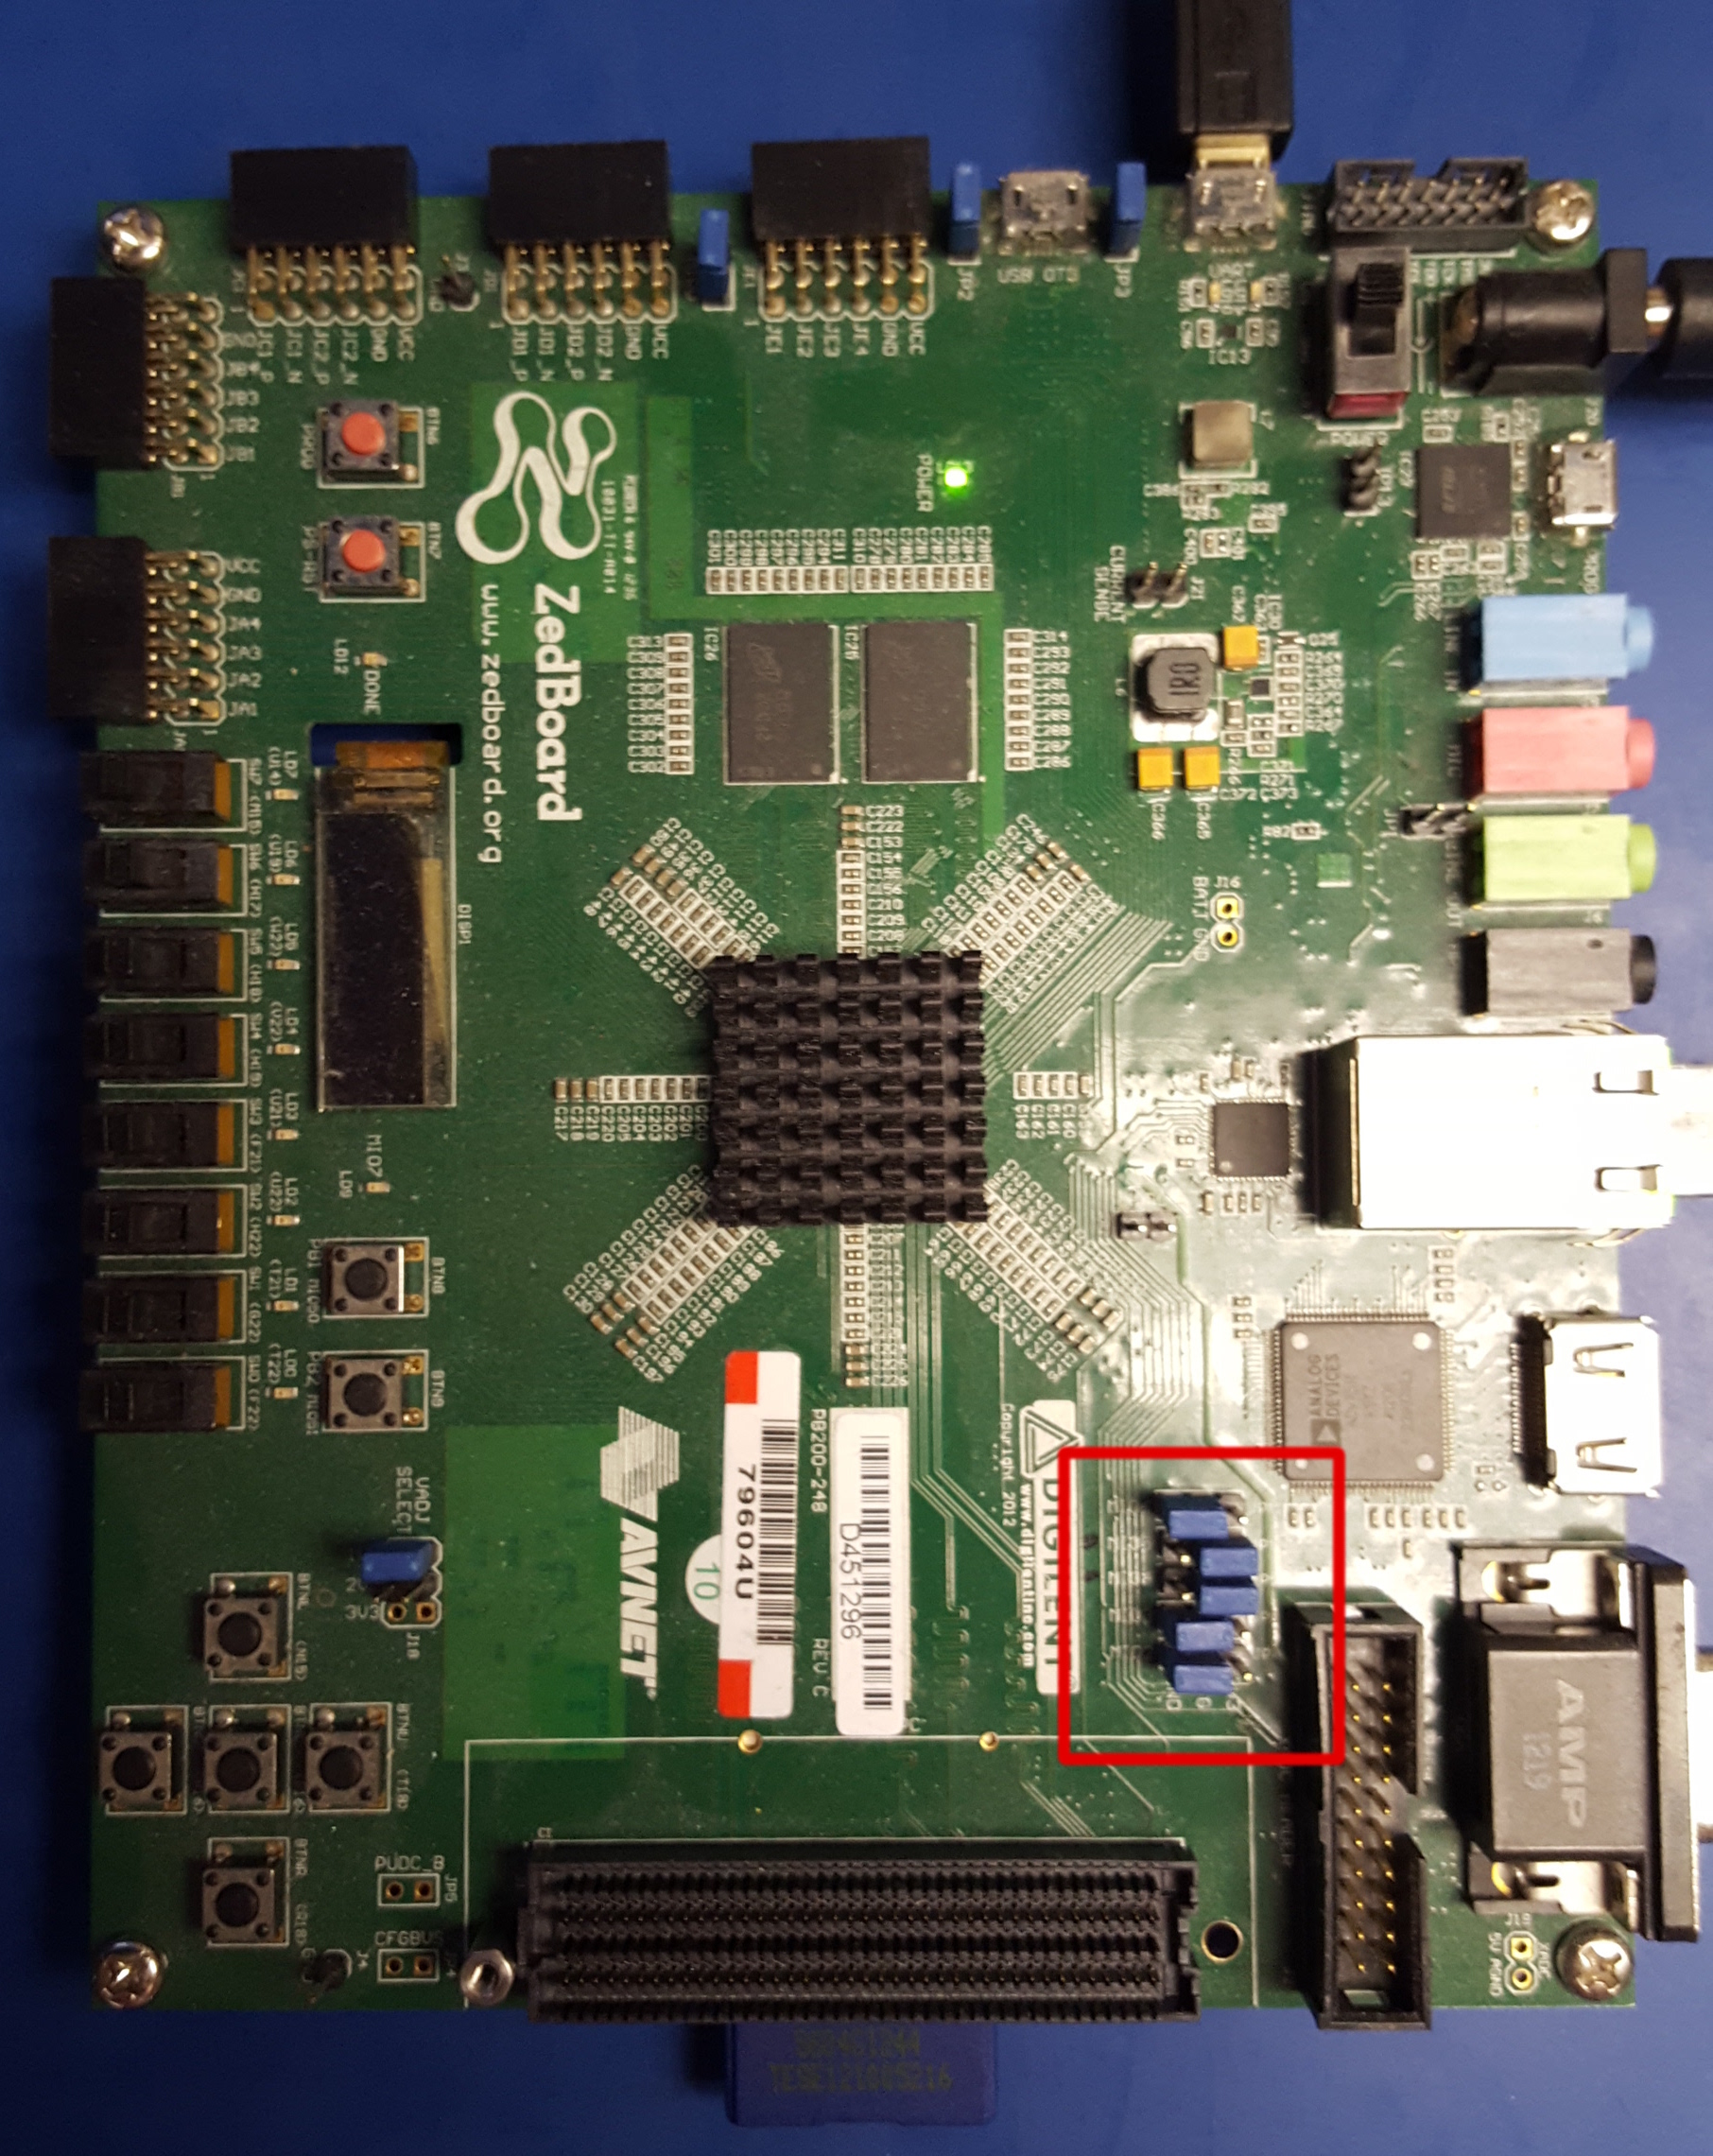
Figure 18: Zedboard Top View with J10, J9, J8 Set
Insert the SD card into the SD card slot.
Connect a terminal to the micro-USB connector on the Zedboard labeled UART. The baud rate should be 115200.
On the development host, start the terminal emulator (usually with the
screencommand) at 115200 baud.Apply power to the Zedboard with the terminal still connected.
Configuring the Runtime Environment on the Platform
The OpenCPI Installation Guide has a section
“Configuring the Runtime Environment on the Embedded System”
that describes how to set up and verify the runtime environment.
This system is initially set with
root for user name and password. Typically, on initial
power-on of the platform, the boot sequence will stop at
the uboot configuration prompt. When this occurs, simply
enter boot to allow the boot sequence to continue:
$ zynq-uboot> boot
After a successful boot to PetaLinux, log in to the system
using root for user name and password:
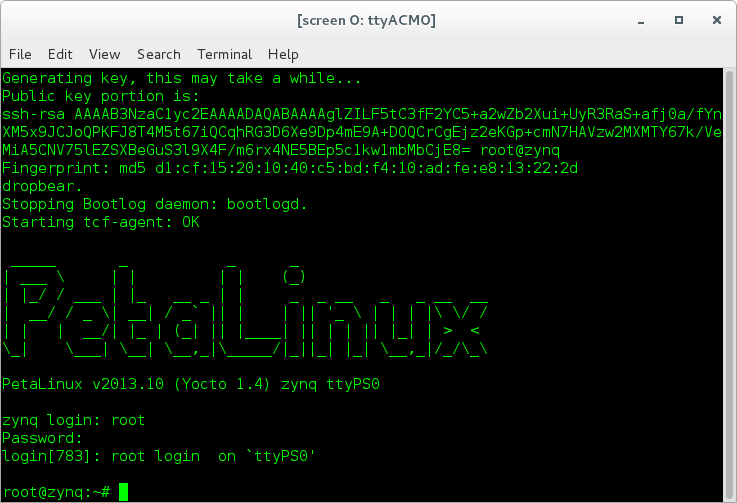
Figure 19: Successful Boot to PetaLinux
When a single ZedBoard is on the network, execute the following command to enable its Ethernet interface:
$ ifconfig eth0 up
When multiple ZedBoards are on the network, you must modify
the mynetsetup.sh script according to the instructions in
Setting up Multiple ZedBoards on the Same Network
before you proceed to the next step of running an application.
Running an Application
The OpenCPI Installation Guide section “Running a Test Application” describes how to run a small test application.
Using Xilinx ISE Instead of Vivado with the Zedboard
As described in the OpenCPI Installation Guide, each OpenCPI platform depends on a set of third-party/vendor tools that need to be manually installed so that the platform can be built. OpenCPI supports two different FPGA/HDL platforms for the ZedBoard:
The
zedplatform (HDL targetzynq), which is built with the Xilinx Vivado toolsThe
zed_iseplatform (HDL targetzynq_ise), which is built with the Xilinx ISE tools
If your environment requires the use of Xilinx ISE tools rather
than the (recommended) Xilinx Vivado tools, you need to target the
zed_ise platform for building bitstreams for the ZedBoard,
not the zed platform.
CMA Region Memory Allocation Warning from the Linux Kernel Driver
The OpenCPI Linux kernel module driver will attempt to make use of the CMA region for direct memory access if it is available. If you make a lot of memory allocations, you may receive the following kernel message:
alloc_contig_range test_pages_isolated([memory-start], [memory-end]) failed
Although this message is a kernel warning, it does not indicate that a memory allocation failure has occurred, only that the CMA engine could not allocate memory on the first pass. The driver’s default behavior is to make a second pass and if that succeeds, you should not see any further error messages. This message cannot be suppressed but it can be safely ignored. An actual allocation failure will generate unambiguous error messages.
Deprecated Zipper Daughtercard
As of OpenCPI Version 1.5, support for Lime Microsystems’ Zipper daughtercard is deprecated. This section contains information about this card that has been removed from the main body of this document.
OpenCPI has been tested on revisions C and D of the ZedBoard. However, limitations have been observed for both revisions when used with the Zipper daughtercard. See the document OpenCPI Zipper/Myriad-RF 1 Daughtercards for details.
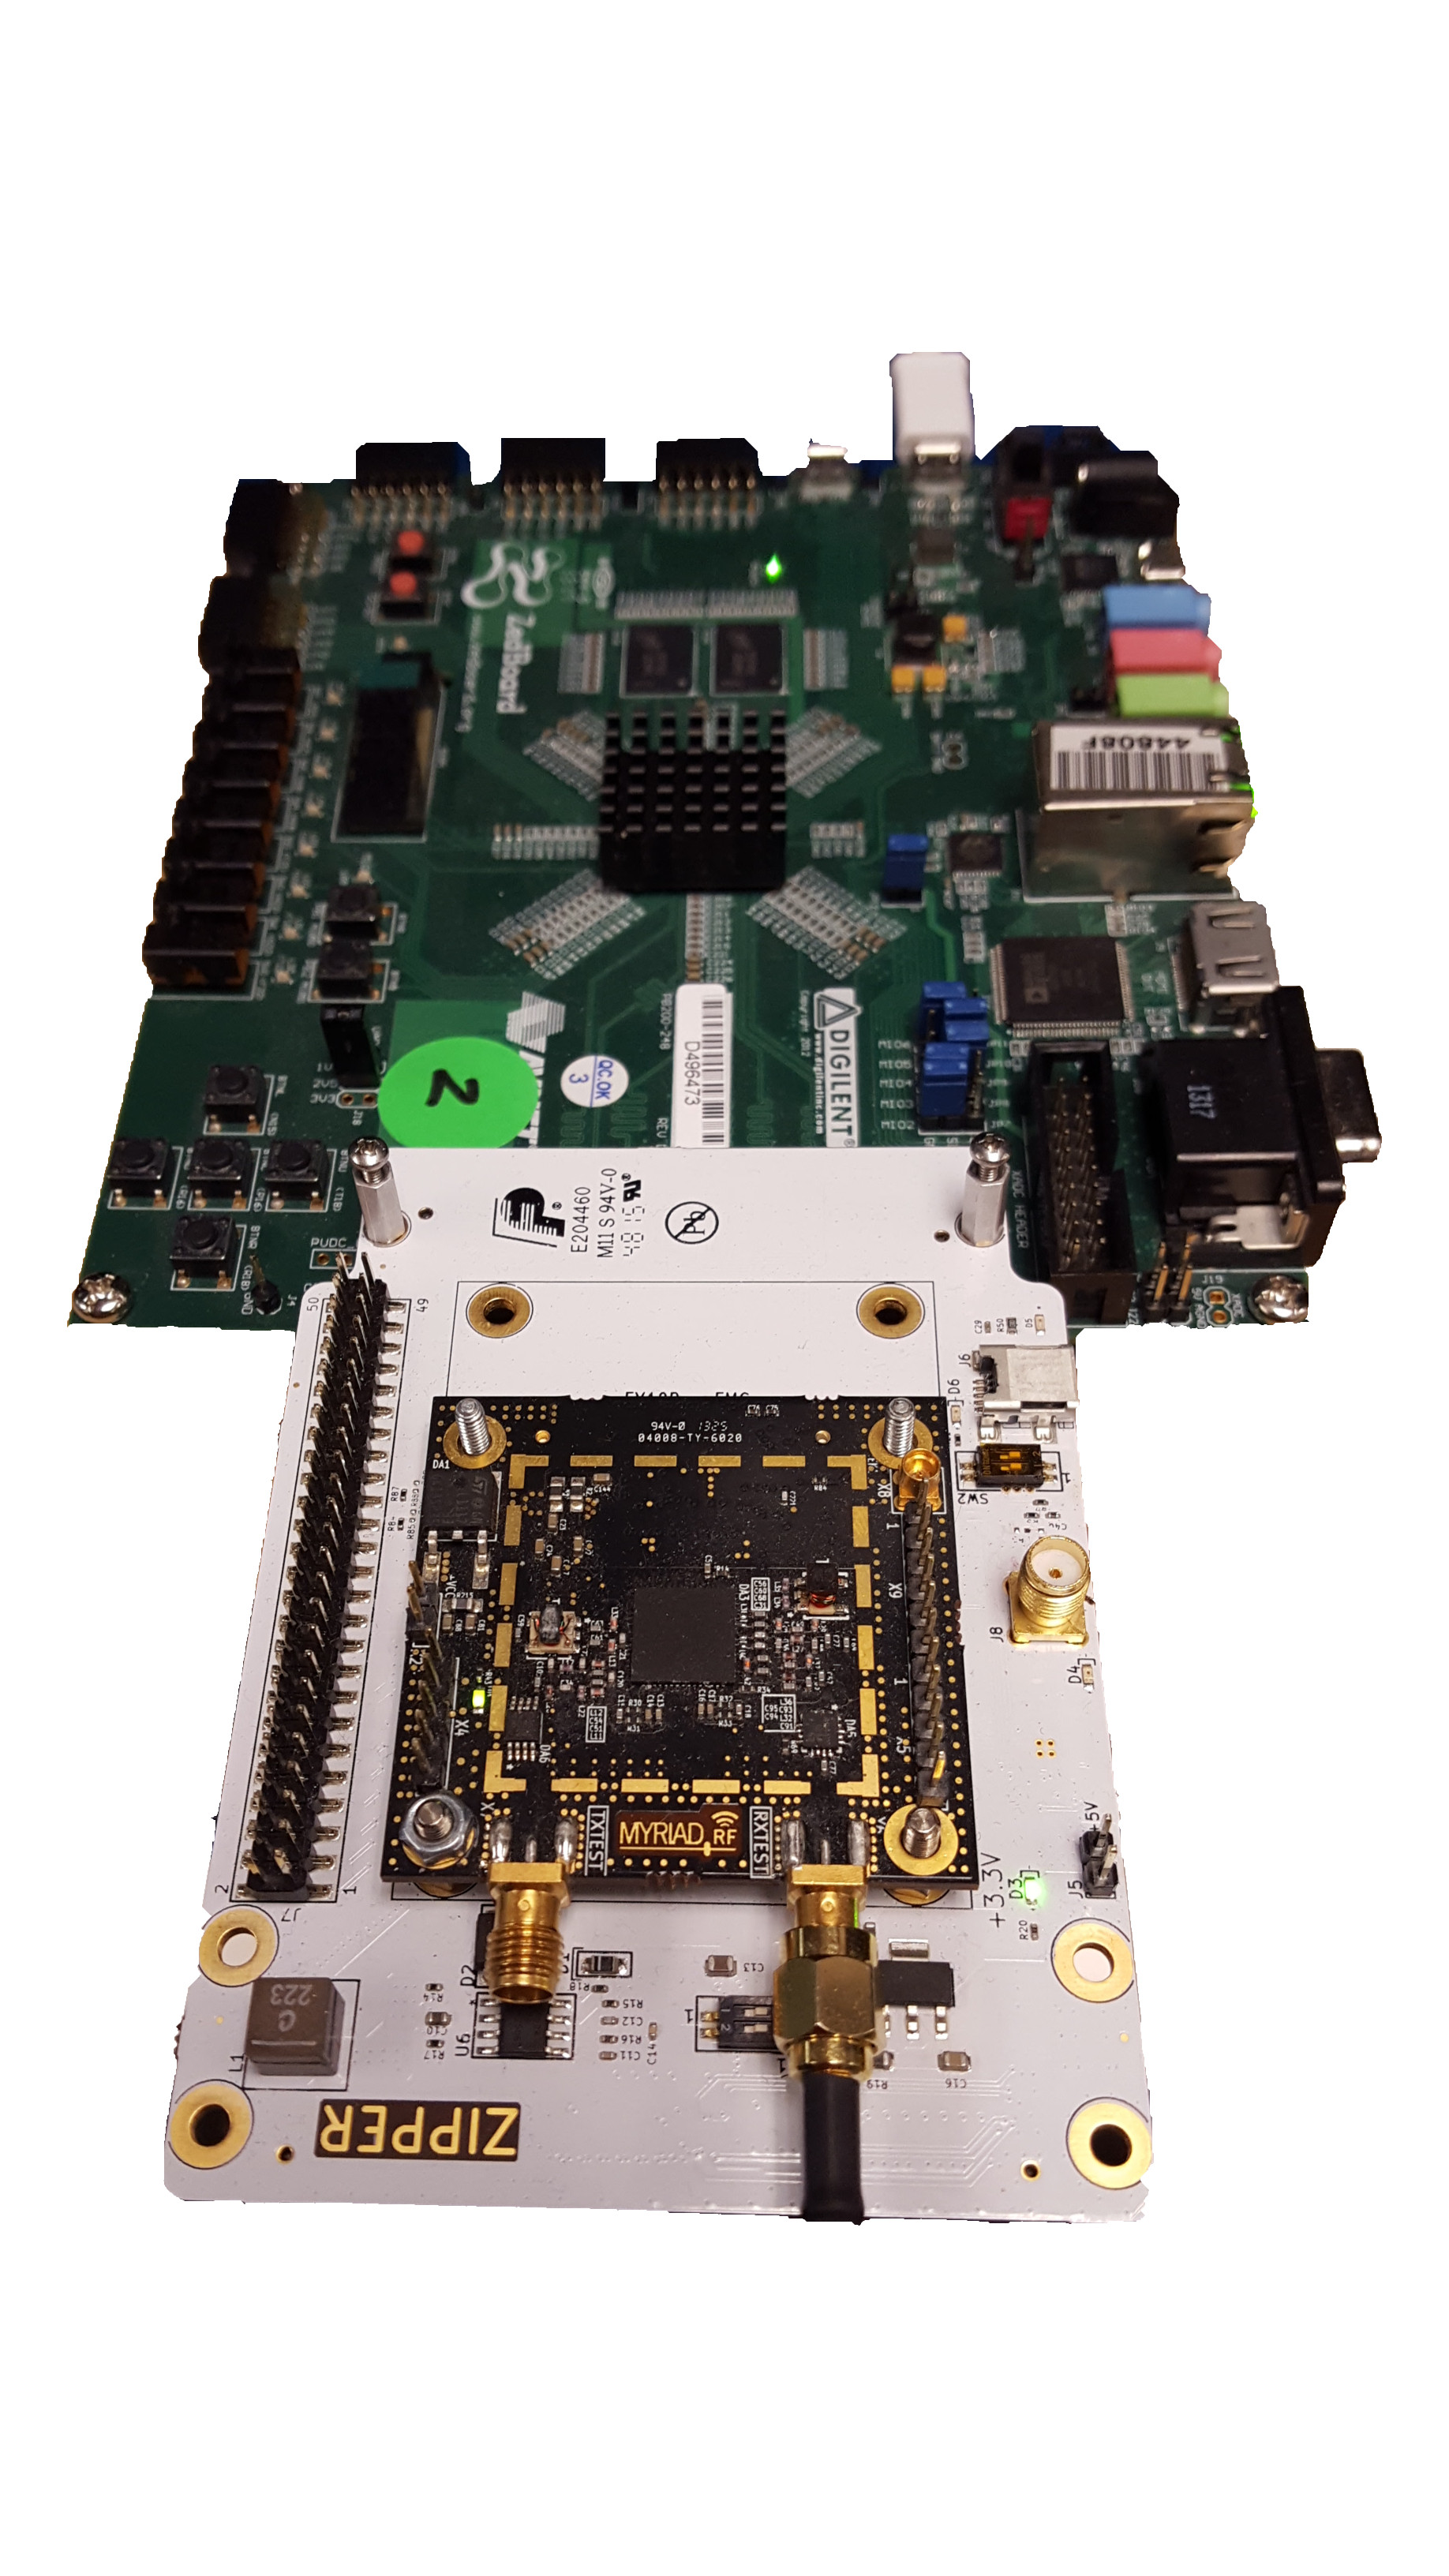
Figure 20: ZedBoard with Zipper and MyriadRF-1 Connected to the FMC Slot